![]() |
|
#1
|
||||
|
||||
![]() Quote:
![]()
__________________
Film maker 42 FGT No8 (Aust) remains 42 FGT No9 (Aust) 42 F15 Keith Webb Macleod, Victoria Australia Also Canadian Military Pattern Vehicles group on Facebook https://www.facebook.com/groups/canadianmilitarypattern |
#2
|
|||
|
|||
![]()
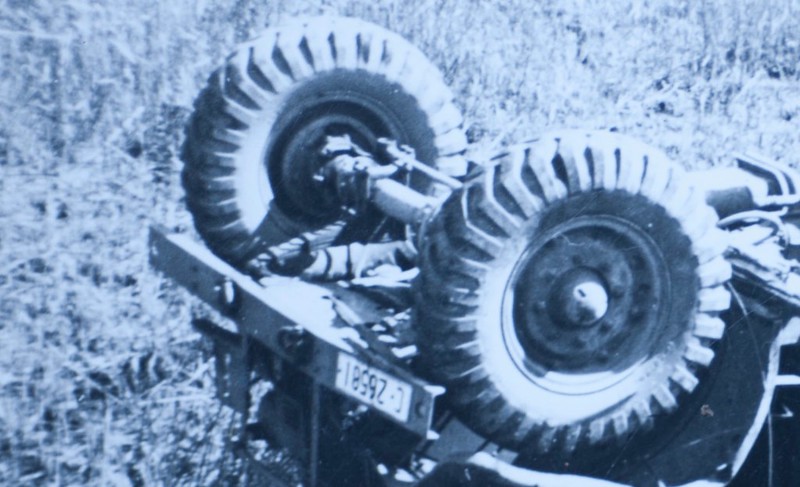
....sure went through a lot of trouble upsetting your truck just for a few pics!!
Or were you doing an oil change and the pan plug was rusted tight???? Bob
__________________
Bob Carriere....B.T.B C15a Cab 11 Hammond, Ontario Canada |
#3
|
||||
|
||||
![]()
That's the way we do them downunder, Bob - turn 'em over to loosen the plug then go right way up to drain whatever didn't come out the top.
__________________
Film maker 42 FGT No8 (Aust) remains 42 FGT No9 (Aust) 42 F15 Keith Webb Macleod, Victoria Australia Also Canadian Military Pattern Vehicles group on Facebook https://www.facebook.com/groups/canadianmilitarypattern |
#4
|
||||
|
||||
![]() Quote:
![]()
__________________
Ford CMP, 115" WB,1942 (Under Restoration...still) Medium sized, half fake, artillery piece project. (The 1/4 Pounder) |
#5
|
|||
|
|||
![]() Quote:
Quote:
![]() Alex
__________________
Chevrolet C8 cab 11 FFW BSA Folding Bicycle Last edited by Alex van de Wetering; 02-04-13 at 15:25. |
#6
|
||||
|
||||
![]() Quote:
I agree with you Keefy and Bob. It has to head straight back towards that cross member in the picture. Further investigation last night shows there just aint enough metal on the apron to cover that distance from the front to the cross member that runs under the engine. Which it appears in the Keefy's photo to do so Nor are there any bolt holes anywhere near the three holes on the apron that line up. Went through the 40-41 parts book to find if there was another plate or bracket but have had no success. Will have another crack though ...
__________________
Pax Vobiscum.......may you eat three meals a day & have regular bowel movements. |
#7
|
||||
|
||||
![]()
In addition to other fiddily bits, I have been making that TAC sign holder as a copy from the original I got from Max.
I would like to put a divisional marking in it of some relevance to my grandfather but the question was... which one? Grandpa was originally with the 21st light horse after doing some research, it seems they were shifted all over the place and re-assigned repeatedly to different units during the war. This made it very difficult pick one sign & my poor old grandfather simply cant remember. I then remembered I had some old photo's he gave me which were of some carriers they were assigned to around 1942. I was stoked to find in one of the images, a pretty clear picture of....a Penquin....Australian 2nd Division. Blokes in the Carrier are (as written on the back of the photo) L to R J.Mack, L.Shooemark, C.A. Forbes, W.H. Brown driving.
__________________
Pax Vobiscum.......may you eat three meals a day & have regular bowel movements. |
#8
|
||||
|
||||
![]() Quote:
Another option would be to choose a different period of your grandfather's service and depict the Division and unit in which he served at that time. That would enable you to choose the period he considers most significant himself, if it doesn't happen to be the one in the photo. If he's a bit hazy on the details you can always get them from his service record. If it happens to be after mid '44 you can use a fractionated unit sign, which allows you to display his actual unit designation. Anyway, just a suggestion, and it may solve your penguin problems!
__________________
One of the original Australian CMP hunters. |
#9
|
||||
|
||||
![]() Quote:
2-12 on Red & Blue Horizontal (Artillery) over 74 (Fd. Regt.) = 2/12th Field Regiment 2-12 on Red (Infantry) over 56 (Inf. Bn.) = 2/12th Battalion 2-12 on Blue (Engineers) over 60 (Fd. Coy.) = 2/12th Field Company 2-12 on Brown (Medical) over 57 (Fd. Amb.) = 2/12th Field Ambulance
__________________
One of the original Australian CMP hunters. |
#10
|
||||
|
||||
![]()
Like this one I did for my truck.
TAC Plate - Unit side.jpg In this case it is 29/46 Inf. Btn. Sorry, I don't have a photo of the 'PASS' side at hand just now.
__________________
Ford CMP, 115" WB,1942 (Under Restoration...still) Medium sized, half fake, artillery piece project. (The 1/4 Pounder) |
#11
|
||||
|
||||
![]()
Thanks to both Tony's and Mike for some very handy information.
Still building the whole picture here but have some supportive evidence that the choice of TAC sign holder is correct. I was going through my disassembly note's along with some unused or broken bolts in containers, when I found the one that contained the passenger side headlight bolts. In it I found this...the piece on the left. That makes two Cab 12's with this style of TAC holder Ive seen. I noticed there is a picture of one on here that also has this TAC holder. The 12 Cab we got the original TAC holder off up at Max's also had a bridge plate attached where Ive got mine. I also dont think it was a coincidence that the holes between the B plate and the guard lined up exactly. I remember someone on this forum saying "Throw NOTHING away"
__________________
Pax Vobiscum.......may you eat three meals a day & have regular bowel movements. Last edited by Ganmain Tony; 20-04-13 at 04:18. |
#12
|
||||
|
||||
![]() Quote:
I have been talking to Steve Stone (UK) who has a Ford F15 Cab 11 and we discussed your photos and the one of Max's apron. The answer is that there are no bolts or screws securing that bottom edge. Steve's has no bolt holes and he is of the opinion that in desert conditions another shield might have been attached. The top edge is secured to bottom of the grille and there are two brackets either side that secure to the chassis through the side of the "cheek" plates, for want of a better word. The photos that Steve has sent me should speak a 1,000 words. Tony, your apron is misshapen, the bottom should curve round more so that it lays horizontal and level with bottom of the bumper from what can be seen. Three photos to follow in next post. I have mislaid your email address, so please PM me and I will send the photos to you. regards, Richard
__________________
Richard 1943 Bedford QLD lorry - 1941 BSA WM20 m/cycle - 1943 Daimler Scout Car Mk2 Member of MVT, IMPS, MVG of NSW, KVE and AMVCS KVE President & KVE News Editor |
#13
|
||||
|
||||
![]()
More photos of Steve's F15 front apron fixing.
__________________
Richard 1943 Bedford QLD lorry - 1941 BSA WM20 m/cycle - 1943 Daimler Scout Car Mk2 Member of MVT, IMPS, MVG of NSW, KVE and AMVCS KVE President & KVE News Editor Last edited by Richard Farrant; 09-04-13 at 23:38. |
#14
|
|||
|
|||
![]()
Here is a pic of an F15A (cab11) in Belgium (ex UK, ex forum member Kenny). It seems the panel is positioned (and curved!) just like the one on Richards pictures of Lukes truck. Unfortunately I haven't got any better pics.
Alex
__________________
Chevrolet C8 cab 11 FFW BSA Folding Bicycle |
#15
|
||||
|
||||
![]()
I don't have a parts book here with me but I'm fairly certain now there is a second plate which was carried through to cab 13 production with two large holes in it so the radiator drain taps can be reached. Not sure whether the cab 13 one is longer than the cab 12 version. The driver's handbook calls it the "radiator splash shield".
These were normally discarded once the vehicle hit civvy life (if not earlier) as they added another stage to radiator removal.
__________________
Film maker 42 FGT No8 (Aust) remains 42 FGT No9 (Aust) 42 F15 Keith Webb Macleod, Victoria Australia Also Canadian Military Pattern Vehicles group on Facebook https://www.facebook.com/groups/canadianmilitarypattern |
#16
|
|||
|
|||
![]()
Tony,
Your possible use of the 2nd Australian Infantry Division formation sign for your CMP throws up some interesting possibilities. The formation sign was first included in the approved list at the end of March 1942, but no individual spec was given for its layout (ie background and insignia colours). In September 1942, the spec was quite specific, viz 'Signs will be painted in BLACK and WHITE in a Sand coloured background, embodied in disruptive painting scheme' (quoted as original with emphasis as original). This was the instruction specific to 2 Aust Inf Div, issued by 2 Aust Inf Div headquarters. However, in April 1943, 2nd Aust Inf Div was simply included in the AHQ overall list without a specific specification, with all formation signs listed as being White insignia on a black background. Later the same year (August), the formation sign was again listed in the overall list, but no spec was given. This has led to a series of interpretations of what the penguin over a boomerang should look like, including the black/white on green background shown in your image. None of the instructions actually say 'on a green background' - but the original instruction does say 'embodied in the disruptive painting scheme' (albeit the sand coloured part). Once the Light Sand/stone colour was discontinued, and replaced by Light Earth (from mid-1942), then it is reasonable to assume that, in general, the formation sign was placed over a Light Earth background - and that is what appears to be the case in your carrier image. Equally, some have interpreted the later instructions as being a black/white image over a BLACK background - the Penguin edges are detailed in a thin white line, and the boomerang is white, not black. This does, however, indicate a level of intricacy that the instructions specifically try and avoid by stating that the designs must be simple and easy to apply with a stencil. So, what do you do if the truck is not going to be disruptively camouflaged? Well, that's an interesting question. Try finding some pics of 2 Div vehicles without camo and see how they interpreted the instructions! Nice pic of an SAR-manufactured carrier, by the way. Mike C |
![]() |
|
|