MLU FORUM  

Go Back   MLU FORUM > MILITARY VEHICLES > The Armour Forum

Notices

Reply
 
Thread Tools Display Modes
  #1  
Old 21-01-10, 03:32
maple_leaf_eh maple_leaf_eh is online now
Terry Warner
 
Join Date: Mar 2004
Location: Shouting at clouds
Posts: 3,152
Default

Quote:
Originally Posted by Jesse Browning View Post
Here are some pictures of the Sexton I brought home in June 2009. Jesse.
What is this complicated piece of early-WWII machining?

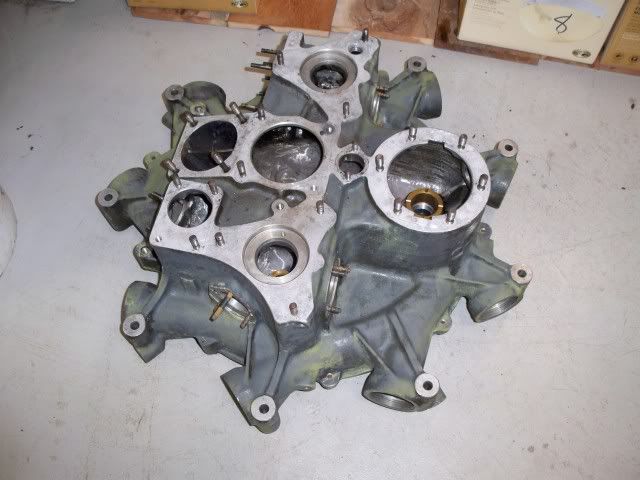
Nice looking piece of hardware. Sometime you will have to make the pilgrimage to eastend Montreal to visit where it was built.
__________________
Terry Warner

- 74-????? M151A2
- 70-08876 M38A1
- 53-71233 M100CDN trailer

Beware! The Green Disease walks among us!
Reply With Quote
  #2  
Old 21-01-10, 04:06
Bob Carriere Bob Carriere is offline
Moderator
 
Join Date: Mar 2003
Location: Hammond, Ontario
Posts: 5,259
Default Wow

I mean WOW

You obviously have tremendous ambition, motivation, time, money, location, talent, a lot of friends not in the picture, no neighbours close by......good looks to be determined.... but with that machine and the way you are going about it.... who cares about looks.

Quite the project.... sure makes a little C15a punny after seeing your baby!!

Please feel free to blow our minds away with more pictures and accounts of your progress.

Boob
__________________
Bob Carriere....B.T.B
C15a Cab 11
Hammond, Ontario
Canada
Reply With Quote
  #3  
Old 21-01-10, 10:31
cantankrs cantankrs is offline
Alex McDougall
 
Join Date: Feb 2009
Location: Kalgoorlie, Western Australia
Posts: 200
Default Blower casing

Quote:
Originally Posted by maple_leaf_eh View Post
What is this complicated piece of early-WWII machining?
Hi Terry,

That'd be the R975 radial motor's blower/accessory casing - the back end of the radial engine. The blower impellor is mainly there to mix and feed the mixture from the carby to each inlet port up on the heads.

Fantastic work Jesse!

Did you press your bogies apart and reassemble?

That the cylinders fit into a plastic bucket each is neat.

Regards

Alex
Reply With Quote
  #4  
Old 21-01-10, 11:36
Hanno Spoelstra's Avatar
Hanno Spoelstra Hanno Spoelstra is offline
MLU Administrator
 
Join Date: Feb 2003
Location: The Netherlands
Posts: 14,868
Default

Jesse,

Great work, thanks for bringing this Sexton back to life and sharing the pictures with us.

Regards,
Hanno
Reply With Quote
  #5  
Old 22-01-10, 01:59
Jesse Browning Jesse Browning is offline
Registered User
 
Join Date: Sep 2009
Location: Waterloo
Posts: 366
Default

Alex; The carrier arm gudgeons had to be pressed out. Most took 40-50 tons. Some on the right side (must have been in the shade) took more than 75. A somewhat different project than the half track and scout cars I have done. I didn't have to up-tool as much as I had thought. The biggest thing was getting familiar with the parts. Read, read, read. Very few automotive parts here. It should be on the road in May. Jesse.
Attached Images
File Type: jpg 100_1290.jpg (123.1 KB, 5 views)
File Type: jpg 100_1291.jpg (109.9 KB, 5 views)
File Type: jpg 100_1325.jpg (100.6 KB, 4 views)
File Type: jpg 100_1329.jpg (74.3 KB, 4 views)
File Type: jpg 100_1414.jpg (87.5 KB, 5 views)

Last edited by Jesse Browning; 05-08-17 at 01:18. Reason: pictures
Reply With Quote
  #6  
Old 22-01-10, 10:04
ron ron is offline
Registered User
 
Join Date: Jan 2006
Location: gold coast qld australia
Posts: 1,294
Default Sexton

Hi jesse,
In a word Fantastic, I am dumb struck,
Please keep the pics coming,
I am in awe of your ability.
Regards Ron
__________________
Ron Winfer
Reply With Quote
  #7  
Old 23-01-10, 18:58
Perry Kitson Perry Kitson is offline
metal urgest
 
Join Date: Sep 2008
Location: London, Ont
Posts: 464
Default

Hello Jesse,

These pictures bring back fond nightmares. I have been poking away at my Sexton (shop # 2115) for 6 years, you have made remarkable progress! I have a few pictures posted on this forum, probably several pages back, as it has been a while since updating the thread. Looks like all the machines from Georgia have suffered the same. Thanks for posting the photos.

Perry
Reply With Quote
  #8  
Old 26-01-10, 02:59
Jesse Browning Jesse Browning is offline
Registered User
 
Join Date: Sep 2009
Location: Waterloo
Posts: 366
Default

A new bottom for a 50 gallon tank.

This came from the first step in the washing process for all the drive train bearings, and internal engine Parts.
Attached Images
File Type: jpg 100_1427.jpg (808.6 KB, 1 views)
File Type: jpg 100_1426.jpg (451.7 KB, 2 views)

Last edited by Jesse Browning; 05-08-17 at 23:35. Reason: Aadd pictures
Reply With Quote
Reply


Posting Rules
You may not post new threads
You may not post replies
You may not post attachments
You may not edit your posts

BB code is On
Smilies are On
[IMG] code is On
HTML code is Off

Forum Jump


All times are GMT +2. The time now is 00:49.


Powered by vBulletin® Version 3.8.4
Copyright ©2000 - 2025, Jelsoft Enterprises Ltd.
Copyright © Maple Leaf Up, 2003-2016