|
#181
 14-10-12, 23:34
|
|||
|
|||
|
Excellent job Tony! Will have to do that for my C8 one day as well.
Alex
__________________
Chevrolet C8 cab 11 FFW BSA Folding Bicycle 
|
|
#182
15-10-12, 07:09
|
||||
|
||||
|
Quote:
Folding the heavier gauge steel with a shifter and finishing off with a hammer is ok providing you do small bends all the way along. I would have also done the two folds at the top of the door a bit differently. To get a sharper folded edge. But honestly this is just clutching at straws. There is no need to be that fussy. Im going to weld the top to the frame. Will post results Just have some good clamps, a big heavy piece of flat steel X 2 and get stuck in.
__________________
Pax Vobiscum.......may you eat three meals a day & have regular bowel movements.
|
|
#183
20-03-13, 12:02
|
||||
|
||||
|
Nothing like an event like Corowa to get you motivated.
Finally finished the passenger door. Pleased with overall result but like any project there are things that aint quite right. There are also a couple more things I have to finish... but good enough for an outing. Bottom hinge had to be carefully bent in a vice prior to painting. Trial fit of the door revealed bottom of door fouling on floor as it shut. Dove tails purchased from Macs (Via TCR Melbourne). Exactly the same as the old ones. Original clips off this door but you can get these from Macs as well. Same with the canvas rod holders. Although they do not look exactly the same. Door handle as close as I could get. Same shape but different groove along the handle.
__________________
Pax Vobiscum.......may you eat three meals a day & have regular bowel movements. Last edited by Ganmain Tony; 20-03-13 at 12:41.
|
|
#184
20-03-13, 12:16
|
||||
|
||||
|
Found an old check strap off another Cab 12. Looks very original but I have no way of knowing if it is..
Door recess was a challenge but Max Hedges loaned me an old one to work off. Phil and Bob.. what'd you guys do here? Went to a furniture place and the bloke there was very helpful. He said the fasteners of the rubber were known as a Biflicated (Spelt correctly?) rivet and that I should go an see a saddler. Well I did and this is what he gave me. Again, not exact but very close. I also got a bridge plate from Wayne Henderson at Corowa. Pretty sure its off an AACO, but after cleaning it up and a coat of yellow kill rust, who cares? Note carefully applied No.7. Can anyone see how that was done?
__________________
Pax Vobiscum.......may you eat three meals a day & have regular bowel movements. Last edited by Ganmain Tony; 20-03-13 at 12:22.
|
|
#185
20-03-13, 12:27
|
|||
|
|||
|
Quote:
Tony, looks like electrical tape to me. Thanks for coming to Corowa. regards Rick.
__________________
1916 Albion A10 1942 White Scoutcar 1940 Chev Staff Car 1940 F30S Cab11 1940 Chev WA LRDG "Te Hai" 1941 F60L Cab12 1943 Ford Lynx 1942 Bren Gun Carrier VR no.2250 Humber FV1601A Saracen Mk1(?) 25pdr. 1940 Weir No.266 25pdr. Australian Short No.185 (?) KVE Member.
|
|
#186
20-03-13, 12:40
|
||||
|
||||
|
I didnt quite get right was the striker. I stripped the lock and it looked dreadful..
I could not believe the difference a sand blast made. OK the rivet and striker runner inside the lock were worn but that was easily fixed. One thing I had to do was build up the end of the striker with weld. Will probably to add another 1/2 an inch more because of the flex in the Cab. Youve only got lean on the B pillar of the Cab and the ruddy door swings open. Got in the truck to got to Corowa, started it, put it into reverse, didnt even let the clutch out and the door swung open   . .Never mind, cable tie for the moment and/or the air con position rod was implemented for Corowa.  Still have to do the inner door handle. Interesting to note this door has the screw holes for an entire inner skin.
__________________
Pax Vobiscum.......may you eat three meals a day & have regular bowel movements.
|
|
#187
20-03-13, 12:44
|
||||
|
||||
|
Quote:
I'm not as good at doing dodgey work as I thought...
__________________
Pax Vobiscum.......may you eat three meals a day & have regular bowel movements.
|
|
#188
20-03-13, 17:05
|
|||
|
|||
|
Excellent work Tony!
Alex
__________________
Chevrolet C8 cab 11 FFW BSA Folding Bicycle
|
|
#189
21-03-13, 05:10
|
|||
|
|||
|
First of all our Chev trucks have a inner skin on the doors that hides many sore spots.
Mac does have the exact door handle with the long grooves....also has very close to original inner handles. I used the Vee shape dovetails from Mac as mine where badly worn off. The repro do look the part even if the blocks are black plastic. Hinges are always a problem...... the overall cab integrity is questionable at best...... the whole door alignment can be ruined by stertching the back of the cab front or back. Later modification were added on the cab 12 by having a 1/2 inch steel plate bolted under the floor plate corner of the cab... also stop straps added to keep the door from hitting the cargo box. There are many parade ground pictures of cab 11 in Canada with the driver's door fully open back against the fuel tank/cargo box...... although not visible I would not be surprised to learned they were actually tied back for easy in and out. Now the lock stricker.... most of the ones I have have been extended by welding or even worst brazing...... mine will need to be resurfaced - rebuilt but I am waiting to see how much is needed. Simialrly I have hinges staht are bent everywhich way...... that will all be the custom adjustment that will be needed to match the oddity of my cab...... it is almost as if each door set is custom made to fit one particular truck. To date I have not been able to source replacement hinges for the cab 11/12 except for some very similar Model T solid brass for $300 + US bucks.... H**l I did not pay that much for the whole truck. On the cab alignment......I have sinned and added the cab 12 floor plates reinforcements as they just bolt right up and will add some metal strips reinforcements to the wooden roof structure for greater rigidity ...... and make sure the tube/pipe of the windshield is properly mig welded with internal L brackets for rigidity. Then drive it on a rough road and shake it all loose hihihi..... ...and if the doors do not fit properly I will drive it with the doors partly opne using the big original shed door hook and eyelet devices.... now we finally know what they were for....all tis time I thougfh they were for ventilation... Bob ........... very nice job by the way....
__________________
Bob Carriere....B.T.B C15a Cab 11 Hammond, Ontario Canada
|
|
#190
24-03-13, 03:58
|
||||
|
||||
|
Love to know the part number for those door handles Bob.. when you have time
Cleaning up minor details now. Finally found a bit of 'bling'. A badge like this will definitley make the beast go better.. Old rifle butt holder AND screws extricated intact!! Original back of ign switch that sits above the steering wheel. Assortment of other bits. Interesting to see two types of engine cover clamps. I thought the single type may have been fitted post war as a make do. But I have now seen 3 Cab 12's with identical arrangements. I'll take that as reasonably supportive evidence of the original layout.
__________________
Pax Vobiscum.......may you eat three meals a day & have regular bowel movements.
|
|
#191
24-03-13, 04:28
|
||||
|
||||
|
Looked up parts book to find the exact name for the 'metal thing' that the crank rod goes through.
Parts book identifies it as the Radiator Shell Lower Apron Assembly. How the blazes does it attach to the truck down the bottom? (Three holes, last photo) Has anyone got any pictures?
__________________
Pax Vobiscum.......may you eat three meals a day & have regular bowel movements. Last edited by Ganmain Tony; 24-03-13 at 09:59.
|
|
#192
31-03-13, 04:10
|
|||
|
|||
|
Outside handle from Mac
E36 Standard straight handle, Chrome 68-702350-A was $23.00 Gasket for above Molded rubber with bead around edge B-7022428-B @$1.00 inside door handle.... fits on the square handle shaft 32-56 panel delivery - chrome A702400C @ $8.50 Once sandblasted they will hold paint very well. Cheers Bob
__________________
Bob Carriere....B.T.B C15a Cab 11 Hammond, Ontario Canada
|
|
#193
31-03-13, 04:14
|
|||
|
|||
|
That apron has to curve back on itself almost 160 degrees..... not sure on the Ford but may bolt on the front hat piece with cage nuts on the edge of the hat piece.... the hat piece is parallel to the bumper the arches are bolted to it.... based on failing memory and Chev on the mind !!!!
Bob
__________________
Bob Carriere....B.T.B C15a Cab 11 Hammond, Ontario Canada
|
|
#194
31-03-13, 04:52
|
||||
|
||||
|
Quote:
__________________
Film maker 42 FGT No8 (Aust) remains 42 FGT No9 (Aust) 42 F15 Keith Webb Macleod, Victoria Australia Also Canadian Military Pattern Vehicles group on Facebook https://www.facebook.com/groups/canadianmilitarypattern
|
|
#195
31-03-13, 05:20
|
|||
|
|||
|
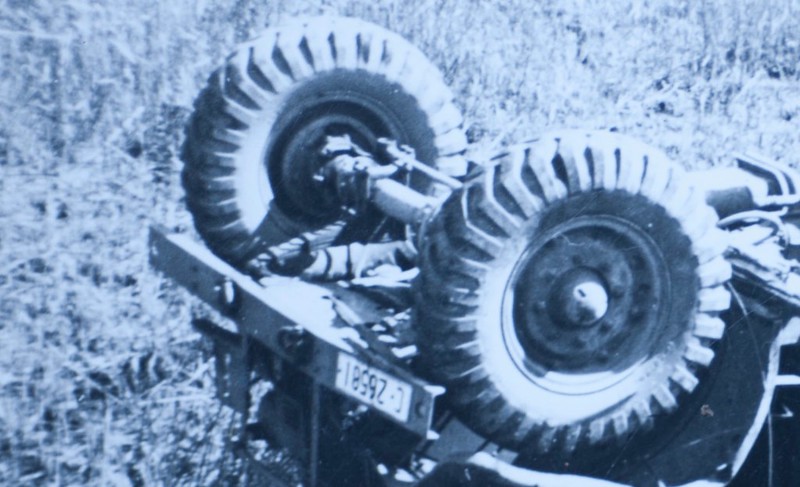
....sure went through a lot of trouble upsetting your truck just for a few pics!!
Or were you doing an oil change and the pan plug was rusted tight???? Bob
__________________
Bob Carriere....B.T.B C15a Cab 11 Hammond, Ontario Canada
|
|
#196
31-03-13, 05:46
|
||||
|
||||
|
That's the way we do them downunder, Bob - turn 'em over to loosen the plug then go right way up to drain whatever didn't come out the top.
Quote:
__________________
Film maker 42 FGT No8 (Aust) remains 42 FGT No9 (Aust) 42 F15 Keith Webb Macleod, Victoria Australia Also Canadian Military Pattern Vehicles group on Facebook https://www.facebook.com/groups/canadianmilitarypattern
|
|
#197
01-04-13, 09:23
|
||||
|
||||
|
Quote:
__________________
One of the original Australian CMP hunters. Last edited by Tony Wheeler; 01-04-13 at 09:31.
|
|
#198
01-04-13, 10:41
|
||||
|
||||
|
Quote:
I may look for suitably sized adhesive numbers, I once bought some large ones from a motorbike shop for ride days at Phillip Island. Which reminds me - maybe we could hold a CMP day there, with some good old Aussie Ford/GM rivalry!
__________________
One of the original Australian CMP hunters.
|
|
#199
02-04-13, 09:23
|
||||
|
||||
|
Thanks Bob, Keith and Tony for the input. This is a tricky one...more photos of that apron would be greatly appreciated if anyone has any.
 Went up to Max's to deliver some very nice tyres. Took some photo's of the two 12 Cabs Max has got but we are none the wiser...other than to support Keith and Bob in so far as the curve appears to be much greater on an apron Max intends to use for his 2WD 12 cab. (Engine sounds awesome by the way) The apron on the F60L of Max's has the same issue that mine has. I did however find a gem that I will make a copy of and return to Max. Although as I was leaving there seemed to be a change of heart from the owner. Something I said???
__________________
Pax Vobiscum.......may you eat three meals a day & have regular bowel movements. Last edited by Ganmain Tony; 02-04-13 at 09:37.
|
|
#200
02-04-13, 11:06
|
||||
|
||||
|
Quote:

__________________
Ford CMP, 115" WB,1942 (Under Restoration...still) Medium sized, half fake, artillery piece project. (The 1/4 Pounder)
|
|
#201
02-04-13, 15:40
|
|||
|
|||
|
Quote:
Quote:
 Alex
__________________
Chevrolet C8 cab 11 FFW BSA Folding Bicycle Last edited by Alex van de Wetering; 02-04-13 at 16:25.
|
|
#202
03-04-13, 09:56
|
||||
|
||||
|
Quote:
I agree with you Keefy and Bob. It has to head straight back towards that cross member in the picture. Further investigation last night shows there just aint enough metal on the apron to cover that distance from the front to the cross member that runs under the engine. Which it appears in the Keefy's photo to do so Nor are there any bolt holes anywhere near the three holes on the apron that line up. Went through the 40-41 parts book to find if there was another plate or bracket but have had no success. Will have another crack though ...
__________________
Pax Vobiscum.......may you eat three meals a day & have regular bowel movements.
|
|
#203
09-04-13, 13:55
|
||||
|
||||
|
In addition to other fiddily bits, I have been making that TAC sign holder as a copy from the original I got from Max.
I would like to put a divisional marking in it of some relevance to my grandfather but the question was... which one? Grandpa was originally with the 21st light horse after doing some research, it seems they were shifted all over the place and re-assigned repeatedly to different units during the war. This made it very difficult pick one sign & my poor old grandfather simply cant remember. I then remembered I had some old photo's he gave me which were of some carriers they were assigned to around 1942. I was stoked to find in one of the images, a pretty clear picture of....a Penquin....Australian 2nd Division. Blokes in the Carrier are (as written on the back of the photo) L to R J.Mack, L.Shooemark, C.A. Forbes, W.H. Brown driving.
__________________
Pax Vobiscum.......may you eat three meals a day & have regular bowel movements.
|
|
#204
09-04-13, 23:59
|
||||
|
||||
|
Quote:
I have been talking to Steve Stone (UK) who has a Ford F15 Cab 11 and we discussed your photos and the one of Max's apron. The answer is that there are no bolts or screws securing that bottom edge. Steve's has no bolt holes and he is of the opinion that in desert conditions another shield might have been attached. The top edge is secured to bottom of the grille and there are two brackets either side that secure to the chassis through the side of the "cheek" plates, for want of a better word. The photos that Steve has sent me should speak a 1,000 words. Tony, your apron is misshapen, the bottom should curve round more so that it lays horizontal and level with bottom of the bumper from what can be seen. Three photos to follow in next post. I have mislaid your email address, so please PM me and I will send the photos to you. regards, Richard
__________________
Richard 1943 Bedford QLD lorry - 1941 BSA WM20 m/cycle - 1943 Daimler Scout Car Mk2 Member of MVT, IMPS, MVG of NSW, KVE and AMVCS KVE President & KVE News Editor
|
|
#205
10-04-13, 00:01
|
||||
|
||||
|
More photos of Steve's F15 front apron fixing.
__________________
Richard 1943 Bedford QLD lorry - 1941 BSA WM20 m/cycle - 1943 Daimler Scout Car Mk2 Member of MVT, IMPS, MVG of NSW, KVE and AMVCS KVE President & KVE News Editor Last edited by Richard Farrant; 10-04-13 at 00:38.
|
|
#206
10-04-13, 00:20
|
|||
|
|||
|
Here is a pic of an F15A (cab11) in Belgium (ex UK, ex forum member Kenny). It seems the panel is positioned (and curved!) just like the one on Richards pictures of Lukes truck. Unfortunately I haven't got any better pics.
Alex
__________________
Chevrolet C8 cab 11 FFW BSA Folding Bicycle
|
|
#207
10-04-13, 00:55
|
||||
|
||||
|
I don't have a parts book here with me but I'm fairly certain now there is a second plate which was carried through to cab 13 production with two large holes in it so the radiator drain taps can be reached. Not sure whether the cab 13 one is longer than the cab 12 version. The driver's handbook calls it the "radiator splash shield".
These were normally discarded once the vehicle hit civvy life (if not earlier) as they added another stage to radiator removal.
__________________
Film maker 42 FGT No8 (Aust) remains 42 FGT No9 (Aust) 42 F15 Keith Webb Macleod, Victoria Australia Also Canadian Military Pattern Vehicles group on Facebook https://www.facebook.com/groups/canadianmilitarypattern
|
|
#208
10-04-13, 04:57
|
|||
|
|||
|
Tony,
Your possible use of the 2nd Australian Infantry Division formation sign for your CMP throws up some interesting possibilities. The formation sign was first included in the approved list at the end of March 1942, but no individual spec was given for its layout (ie background and insignia colours). In September 1942, the spec was quite specific, viz 'Signs will be painted in BLACK and WHITE in a Sand coloured background, embodied in disruptive painting scheme' (quoted as original with emphasis as original). This was the instruction specific to 2 Aust Inf Div, issued by 2 Aust Inf Div headquarters. However, in April 1943, 2nd Aust Inf Div was simply included in the AHQ overall list without a specific specification, with all formation signs listed as being White insignia on a black background. Later the same year (August), the formation sign was again listed in the overall list, but no spec was given. This has led to a series of interpretations of what the penguin over a boomerang should look like, including the black/white on green background shown in your image. None of the instructions actually say 'on a green background' - but the original instruction does say 'embodied in the disruptive painting scheme' (albeit the sand coloured part). Once the Light Sand/stone colour was discontinued, and replaced by Light Earth (from mid-1942), then it is reasonable to assume that, in general, the formation sign was placed over a Light Earth background - and that is what appears to be the case in your carrier image. Equally, some have interpreted the later instructions as being a black/white image over a BLACK background - the Penguin edges are detailed in a thin white line, and the boomerang is white, not black. This does, however, indicate a level of intricacy that the instructions specifically try and avoid by stating that the designs must be simple and easy to apply with a stencil. So, what do you do if the truck is not going to be disruptively camouflaged? Well, that's an interesting question. Try finding some pics of 2 Div vehicles without camo and see how they interpreted the instructions! Nice pic of an SAR-manufactured carrier, by the way. Mike C
|
|
#209
10-04-13, 09:00
|
||||
|
||||
|
Wonderful stuff fellows
Knew I could rely on you!!! Terrific pictures Richard.... really makes sense how that apron should be laid out and a good supporting one from Alex. Can now get on with making the shroud get into something of its orginal shape. I agree Keith, I still reckon there's got to be another plate attached to the apron. Interesting to hear that it's listed as a Cab 13 part as well Keefy..
__________________
Pax Vobiscum.......may you eat three meals a day & have regular bowel movements.
|
|
#210
10-04-13, 09:05
|
||||
|
||||
|
Quote:
__________________
Pax Vobiscum.......may you eat three meals a day & have regular bowel movements.
|
 |
| Thread Tools | |
| Display Modes | |
|
|


 Linear Mode

