|
|
|
#1
 28-05-14, 11:53
|
|||
|
|||
|
Do you know someone with a boat fuel tank?
A 4 mm welding rod makes a good source for the pins.
__________________
Bluebell Carrier Armoured O.P. No1 Mk3 W. T84991 Carrier Bren No2.Mk.I. NewZealand Railways. NZR.6. Dodge WC55. 37mm Gun Motor Carriage M6 Jeep Mb #135668 So many questions.... 
|
|
#3
28-05-14, 17:29
|
||||
|
||||
|
Cheers, I have the straps and the base mounts for the turnbuckles, along with one turnbuckle (one missing) so it's just the floor "standoffs" I need to sort.
Anyone tell me how much oil I need to fill the gearbox and diff with ? ( I am on holiday and my books are not to hand) just going to order some oils online :-)
__________________
is mos redintegro __5th Div___46th Div__ 1942 Ford Universal Carrier No.3 MkI* Lower Hull No. 10131 War Department CT54508 (SOLD) 1944 Ford Universal Carrier MkII* (under restoration). 1944 Morris C8 radio body (under restoration).
|
|
#4
28-05-14, 21:01
|
||||
|
||||
|
Those same turnbuckles are available today from Aircract Spruce. They are expensive but then again they are rated for aeronautical use. I don't have part numbers handy though.
I also just redid my original fuel tank. Poured muratic acid in. Let it sit on each side for a couple of minutes then sloshes it around to get the baffles. Rinsed out with many gallons of water and a box of baking soda. I then used the tank etch and sealer from Mac's AutoParts. Did two coats of sealer and it looks great. I also soldiered up three pin holes before sealing the tank.
__________________
Jordan Baker RHLI Museum, Otter LRC C15A-Wire3, 1944 Willys MB, 1942 10cwt Canadian trailer
|
|
#5
13-06-14, 20:15
|
||||
|
||||
|
Well it's been a while since I posted up any progress.
The engine has finally been hooked up to a radiator and run through until hot and I am glad to say that no oil mixed with the water, and vice versa. At this moment in time I have four or five different things on the go at once, time is certainly running down and there is a fear in the back of my mind that the carrier won't make it to war and peace..... There is not much left to do to get her mobile, but there is no time or financial contingent left now that we are counting down to H hour. So as long as things go without hitch we might just make it yet ! Checkie has supplied me with the required wiring to start running it through the carrier, so between other jobs, I have been running a cable in here and there. 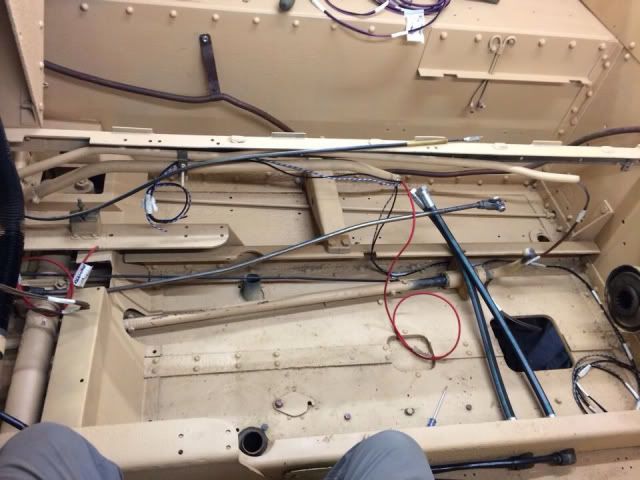 I have had to re manufacture the fuel tank straps, which was pretty straight forward, there was enough bits to cobble up an original strap but for something safety critical like this I retired the original bits and made new. 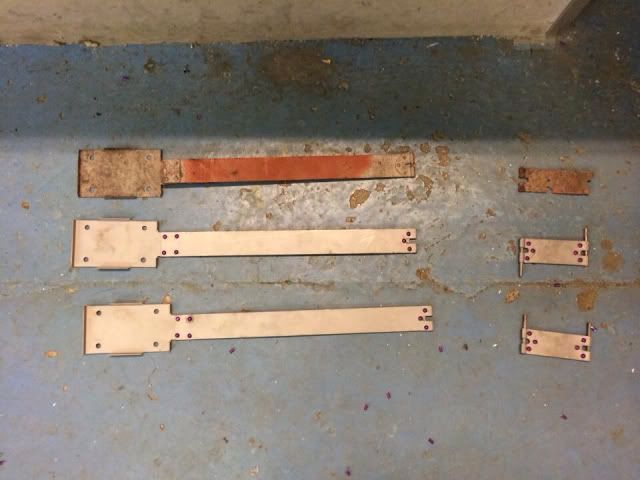 As for the fuel tank I have coated the inside with POR15 so it's now ready for fuel ! 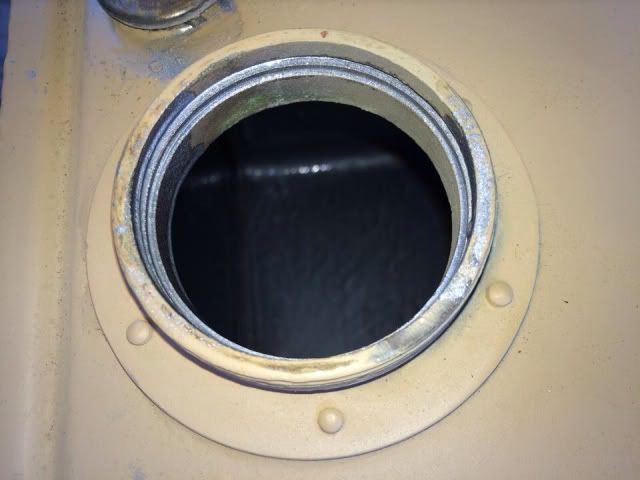 The linkages have been on hold until the clevis pins arrive, however the new throttle pedal has been installed 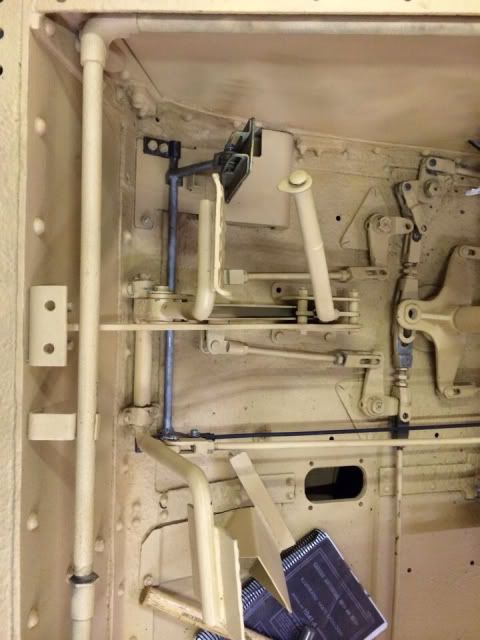 And also the air duct scoop has had its new metal grafts onto the remains of the original. 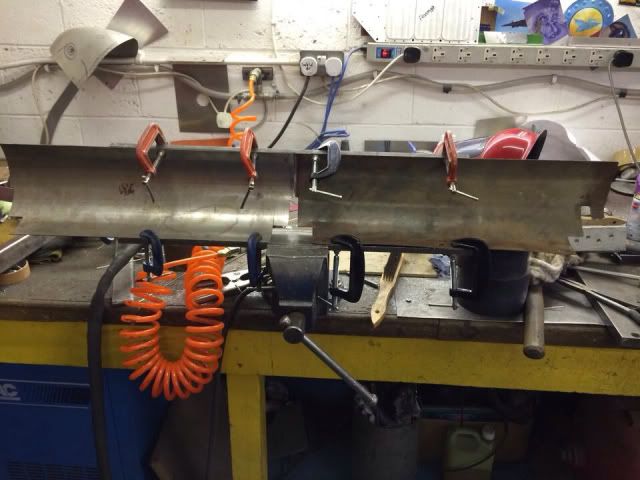 I have also bolted on the fixed original bits to the axle cover plate. 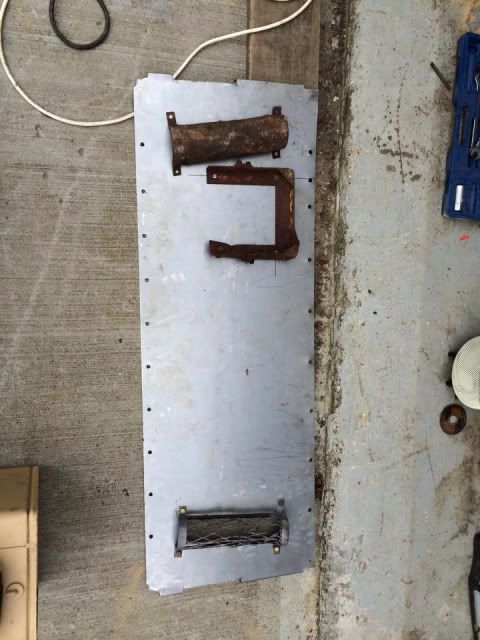 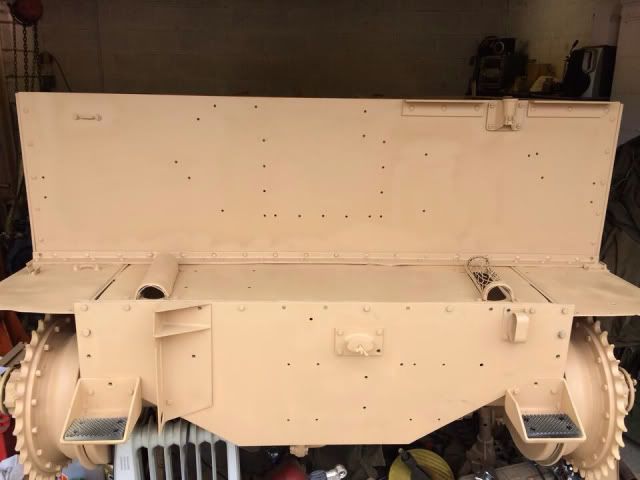 Now that most of the dirty work has been done, I can start the detail work, which I decided would start with the disruptive pattern..... As used in 43 during Operation Husky. 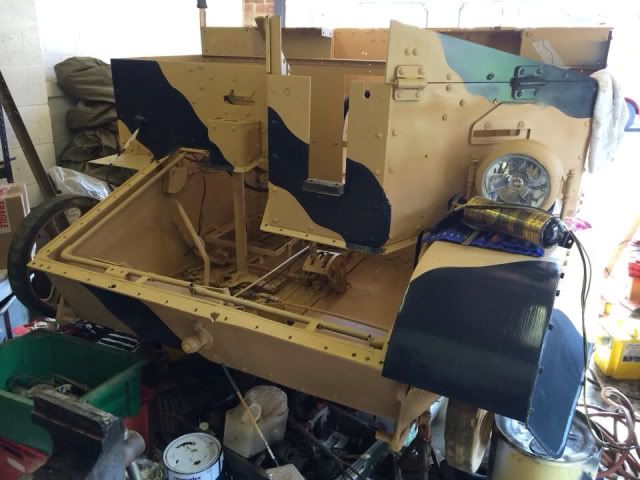 And finally for now.... Just to remind myself how far the thing has come 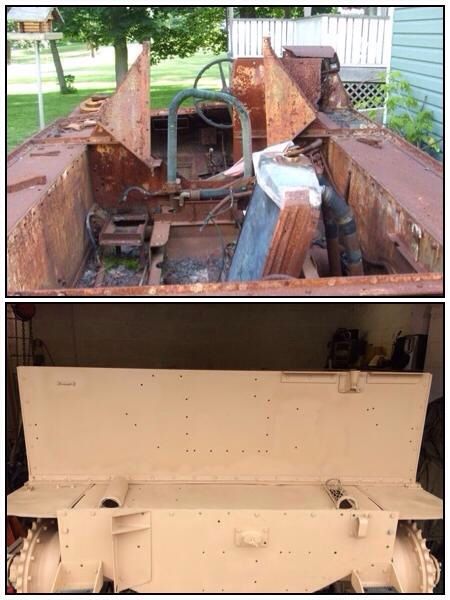 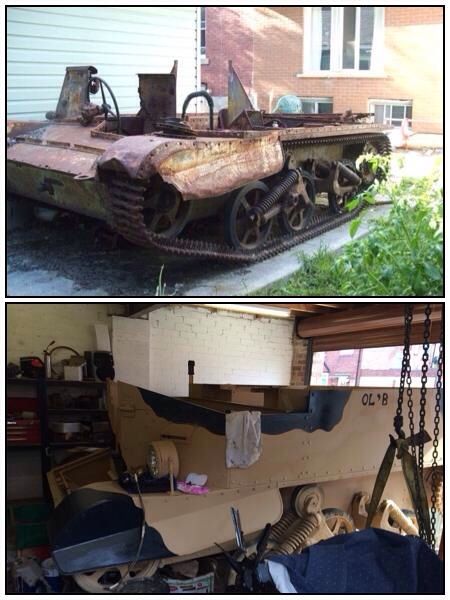
__________________
is mos redintegro __5th Div___46th Div__ 1942 Ford Universal Carrier No.3 MkI* Lower Hull No. 10131 War Department CT54508 (SOLD) 1944 Ford Universal Carrier MkII* (under restoration). 1944 Morris C8 radio body (under restoration).
|
|
#6
13-06-14, 21:12
|
|||
|
|||
|
not too shabby mate, not too shabby at all. see you in the arena.
rick
__________________
_______________________ 1941 mk1 mortar Carrier 1941 Mk1* Carrier 1942 Mk1* Carrier 1943 T16 Carrier 1945 Mk3 Dingo 1941 Mk3 Covenanter 1941 Mk4 Churchill AVRE (now sold) 1944 Mk6 Cromwell (now sold) 1952 Mk3 Centurion 1952 ARV Centurion 1952 ARV Centurion 1953 Mk3 Centurion (breaking)
|
 |
| Thread Tools | |
| Display Modes | |
|
|


 Hybrid Mode
