|
#1
 02-01-09, 03:39
|
||||
|
||||
|
Welcome to the New Year and the new Hammond Barn thread. It is always nice to start with a clean slate, so today, Bob, Grant and I spent some time at the barn doing chores. It was only minus 18oC with a wind chill that took it to about minus30oC at times. The boys beat me to the barn today and had just sparked up Lucifer when I arrived.
Bob and Grant played with the new snow blower - I think they are making it into a transformer...Not much was done with bare hands outside or inside the barn today. The boys looked chilly... 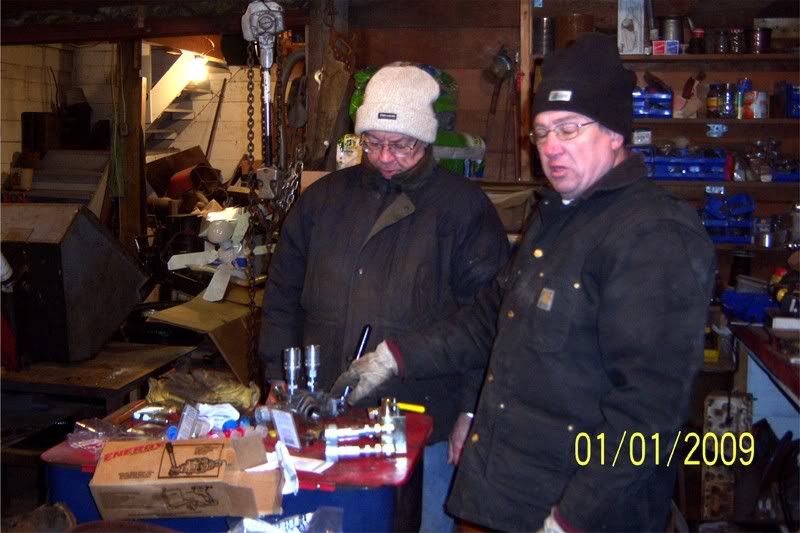 I did a scrap metal clean up and rearranged beneath one of the work tables. We reestabled our rag supply and had fun ripping up some old shirts and unmentionables that were donated to the cause. This was followed up by installing two radiator support mounts - thanks to Phil Waterman for the photos of his HUP...much appreciated. Here are some of the major goals for the Hammond Quartet this year: End of Summer Update Dress "Lettie" (Bob's truck) up in her sheet metal;In progress Get my HUP - AKA "Metal Mistress" running; Done Get Grant's engine into his radio truck; Working on that Test Guy's sewing ability; Done - shift boot Install new shelves in the attic of the barn;Later Clean the barn; A never ending chore Conduct a pole barn building feasibility study;Done - looks like sea containers might be a substitute Do the Barrie Flea Market - twice; Done Go to CC; and Missed it - literally and figuratively Organize and conduct BBB3. Shit canned for this year - it's the economy, you know... It should be a great year at the Hammond Barn. We will keep you posted!
__________________
RHC Why is it that when you have the $$, you don't have the time, and when you have the time you don't have the $$? Last edited by RHClarke; 23-09-09 at 05:25. 
|
|
#2
02-01-09, 06:14
|
||||
|
||||
|
Sally's first thought was, "So that's where Santa's elves go after Christmas!". All I thought was that it's good to see you mangy lot survived New Year's...
 We look forward to a good number of entertaining get-togethers this coming year!! Drive on, lads...  
__________________
SUNRAY SENDS AND ENDS :remember :support
|
|
#3
02-01-09, 19:27
|
||||
|
||||
|
Geoff, ask Sally if she meant Santa's elves or is it Sneezy and Grumpy?

__________________
Every twenty minute job is one broken bolt away from a three day ordeal.
|
|
#4
02-01-09, 20:56
|
||||
|
||||
|
If the snowfall for the month of December is any indication, we are in for a good load of it in the New Year. Here is a small taste of what our Aussie friends are missing:
Clive's shelter interior shot: 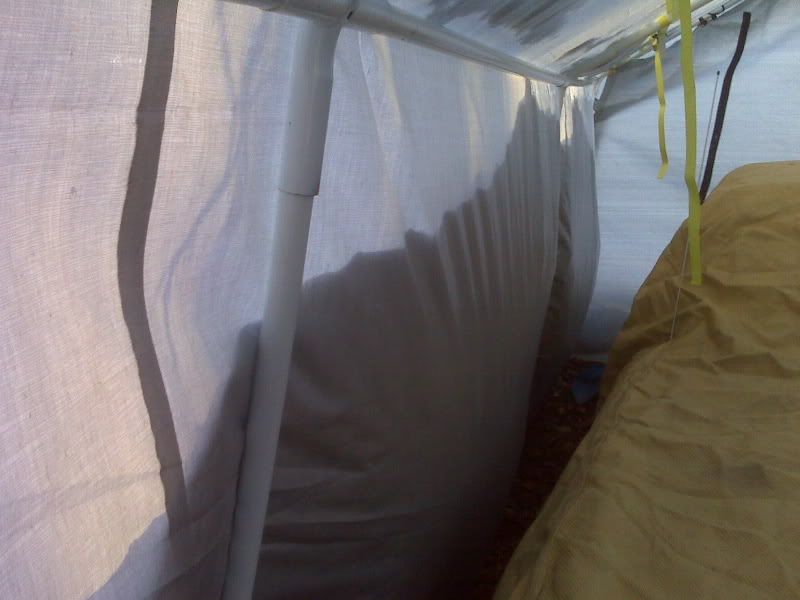 Clive's shelter exterior before shot: 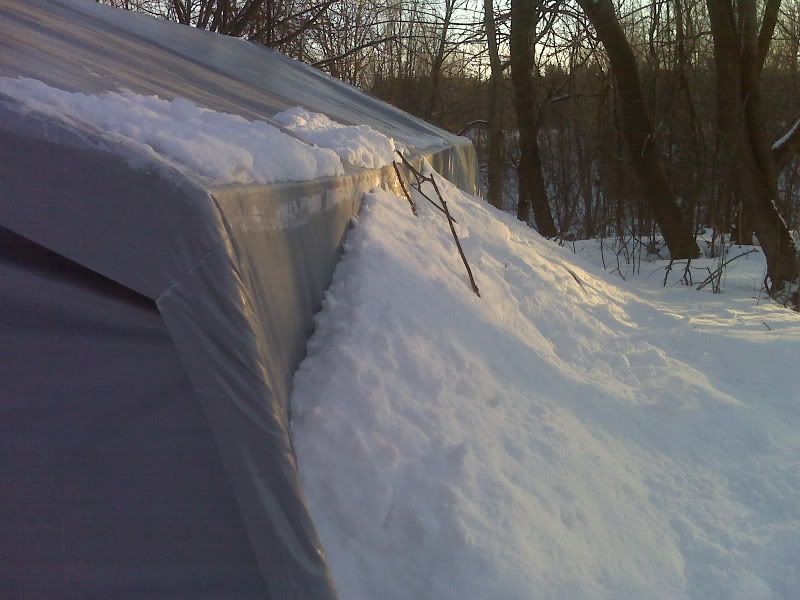 Clive's shelter exterior after shot: 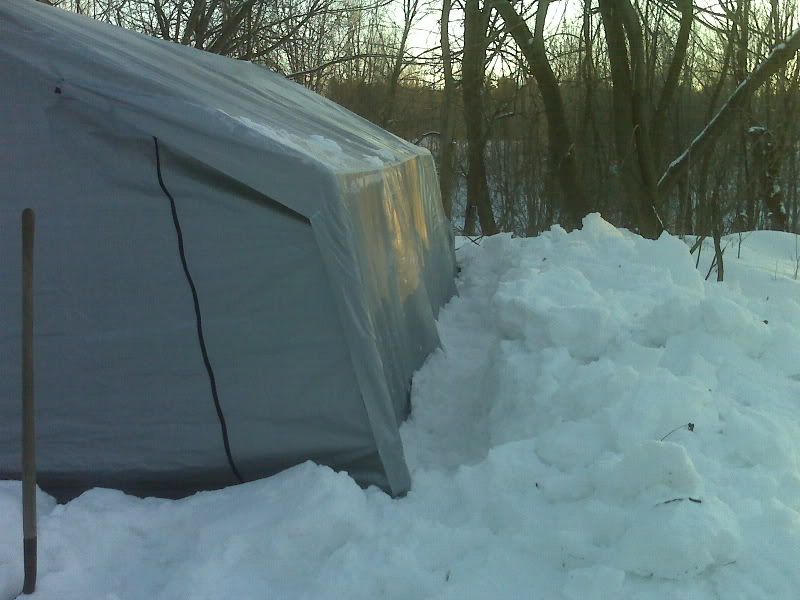 This shelter has a 8 foot peak. The design of the shelter causes the snow to (hopefully) slide off, but this builds up a lot of force against the shelter necessitating clearing every few weeks or so. Certainly worth "Deu Biyair", n'est pas, zanmi, Clive?
__________________
RHC Why is it that when you have the $$, you don't have the time, and when you have the time you don't have the $$? Last edited by RHClarke; 03-01-09 at 06:25.
|
|
#5
04-01-09, 00:16
|
||||
|
||||
|
Whilst surfing today, I came upon an interesting website that showed the allocation of UK War Dept numbers. I think a few of our members are familiar with this website and perhaps there are others out there. Curious, I scrolled down thru the contract numbers and recognized my HUP's contract number. My HUP was built under contract SM 6407 and is mentioned on the website:
http://clubs.hemmings.com/clubsites/...k/warchev.html For info purposes and just in case my computer burns up, or my son reformats the hard drive, I'll store shots of the HUP data plates here:    Anyone have a C-8A-04 Spare Parts List?
__________________
RHC Why is it that when you have the $$, you don't have the time, and when you have the time you don't have the $$?
|
|
#6
04-01-09, 22:48
|
||||
|
||||
|
Quote:
That page was compiled by our resident GM Historian David Hayward. He probably got your HUP's details off this forum. Hanno
__________________
Regards, Hanno --------------------------
|
|
#7
05-01-09, 04:36
|
||||
|
||||
|
Quote:
Here is what we were up to today in Ottawa's frigid region: Bob and Grant fed the chickens or salted the doorway.  After that fun we dug out the trailers in preparation for a potential road trip(s). Bob headed for the house to fix dinner for the annual Hammond Christmas time dinner. Grant and I played with the HUP front fender and managed to wrestle it on.  This fender came with the HUP and was like the others, a pretzel wannabe with some missing metal. I had it restored but in the process the metal got distorted and the bolt holes did not match up with the capture nuts too well. However, a few minutes with a bottle jack and Grant's advice and assistance won the day.  Later we retired to Chateau Carriere for some of Bob and Joyce's finest food and wine. After a day in the cold, the warm house, fine wine and great food put us in the mood to chat about the upcoming year. And what a year it should be. Bob hit the jackpot with Joyce as his better half. She is an incredible supporter of the CMP cause and encourages Bob in the pursuit of this great hobby. Bob models his new jacket received as a Christmas present:  A close up of the logo:  And all I got from my wife was a nudie calendar...
__________________
RHC Why is it that when you have the $$, you don't have the time, and when you have the time you don't have the $$? Last edited by RHClarke; 14-01-09 at 00:34.
|
|
#8
18-01-09, 23:56
|
||||
|
||||
|
It's been too freakin cold for outside the barn work the past few weeks. We have been limited to short periods of work inside the barn. Today, the temp went up to -16oC! Downright balmy...a good day to work in the shelter.
I spent most of the morning working on my front pax side door. Bent hinge arms, loose hinges, missing brass spacers and the cold weather made it a longer than usual job to hang just one small door. This shot shows the stamping lines and the outline for the wiring diagram plate:  The almost finished product:  Bob showed up mid-morning to off load the goodies we got from Greg Wright. After stowing our canvas and rags, Bob and I headed to the barn with two new additions. Greg provided the barn with two large fire extinguishers - much appreciated additions to the barn. Bob and I set one each in the front and rear portion of the barn. 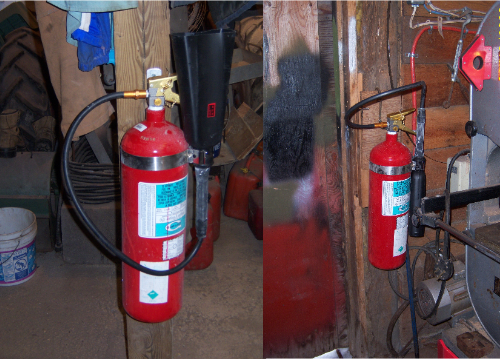 Grant was busy at home today, so we didn't see him at the barn. At noon, we went to Mike's Place in Hammond (our new haute cuisine locale) for a good breakfast. Following that, more clean up and small tasks. Bob grabbed his doors and did a rust damage assessment.  Some interesting markings on Bob's door. 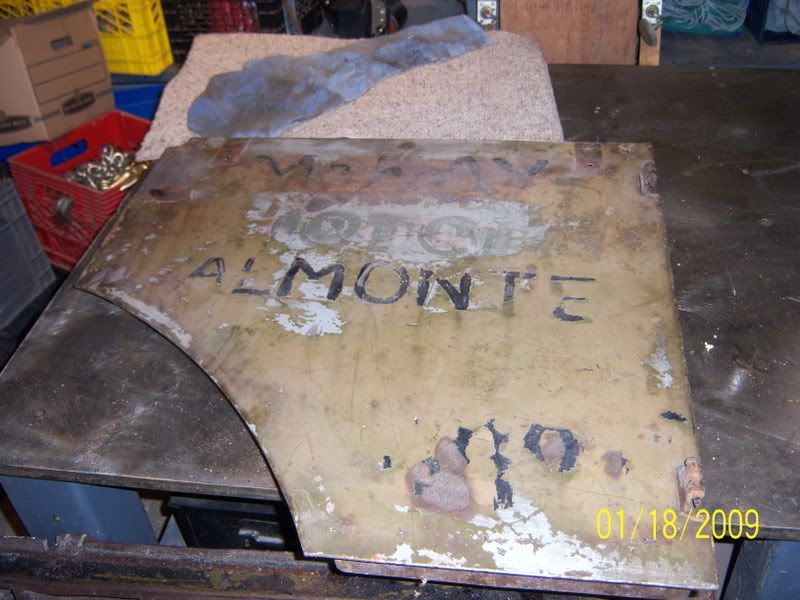 After the wood fire burned down in Lucifer, Bob and I headed out for domestic chores.
__________________
RHC Why is it that when you have the $$, you don't have the time, and when you have the time you don't have the $$? Last edited by RHClarke; 19-01-09 at 19:00. Reason: Poor French...
|
|
#9
22-01-09, 16:35
|
|||
|
|||
|
Hi Rob,
Glad to see that you were able to use the extinguishers, I was tired of tripping over them mounted on the posts. I have set some water fire extinguishers aside for the barn when you are welding. I have some more rags as well if you need them. Your hup is looking good. It's great to see you guys working together to restore your trucks. Keep the pictures coming on the progress. Thanks for the invite to gracies. Cheers,   Greg
__________________
1986 Bombardier Iltis M101 CDN2 1/4t Trailer
|
|
#10
02-02-09, 05:27
|
||||
|
||||
|
Snow. It's everywhere. It's deep. It gets into your boots. It covers everything. It falls on you. You fall in it. It tests the patience of the most laid back Canuck, and managing it took most of Saturday (Bob and the sno-blower) and most of todays effort.
When I retire for good, I'm heading south with some snowshoes on the roof of the car. The first place that I stop at and where someone asks "What the hell are those?" that is where I will live out my last years...but I have to ask the wife's permission first. The good news is that there are only two more "snow months" left, and then we get to roll around in the mud for two months...Somewhere in between we will actually get some CMP work done. I hope...
__________________
RHC Why is it that when you have the $$, you don't have the time, and when you have the time you don't have the $$?
|
|
#11
14-02-09, 17:36
|
||||
|
||||
|
I suspect it will continue to be quiet at the barn as last week the HUP saw its shadow...too bad the tradition of six more weeks of winter wasn't true here - it would mean winter would end early. Sigh...
 The only progress made was the solving of the spare tire mount set up. My HUP has two bolts sticking out of the recessed wall where the spare is mounted. A lot of HUP photos show only the bar and nut configuration with the wheel mounted. I had thought that there was only one bolt that held the spare on. Actually there are three bolts - two mounted on the wall and one that impales the opening in the spare tire's rim. Many thanks to Clive for the detailed photos...they are priceless. 
__________________
RHC Why is it that when you have the $$, you don't have the time, and when you have the time you don't have the $$?
|
|
#12
15-02-09, 05:19
|
|||
|
|||
|
RH,
The HUP is really starting to take shape....hope to see you guys in the very near future...at least once the white @#$% is gone. cheers Mike Timoshyk
|
|
#13
16-02-09, 18:54
|
||||
|
||||
|
It was a good Sunday at the barn as it warmed up to -3oC. After a fairly early start, Bob and Grant found serial numbers hidden under layers of paint on Bob's doors. Grant pulled apart the doors - removing the outer skins so that Bob could map the interior dimensions. Two things were noted - there was no paint on the interior surfaces, and penetrating oil really penetrates! The oil was sprayed on some of the nuts and bolts and had seeped almost to the other side of the door.
While they played with the doors, I worked on fabbing up replacement parts for the spare tire holder. I made the cross bar and its cover (see two up for photo of the original). After failing to make a squared away bracket, I called in Bob, who came up with a really simple way of making a bracket. He took a length of square tubing, cut one side off and bent out the sides making a very good looking bracket. While not exactly like the original, it will be hidden behind the spare anyway. I also played with the other two fenders. After heating them up near Lucifer, I undercoated them and then added the mudflaps. The front fender went on with very little fuss. The large rear fender will have to wait until next week. It is gratifying to see things coming along (after all these years...).
__________________
RHC Why is it that when you have the $$, you don't have the time, and when you have the time you don't have the $$? Last edited by RHClarke; 18-02-09 at 22:22.
|
|
#14
16-02-09, 21:48
|
||||
|
||||
|
Quote:

__________________
Those who live by the sword will be shot by those of us who have progressed. - M38A1, 67-07800, ex LETE
|
|
#15
17-02-09, 01:18
|
|||
|
|||
|
Quote:
You raise a very important point about CMP doors which I have confirmed on all three of my trucks. The inside of the doors were not painted hence some of the rust out problems. I have tackled this in different ways if I re-skinned the doors I have painted the inside. When not re-skinning I've removed the doors taped up all the openings and poured in about a quart of cosmoline like industrial rust inhibitor, the waxy stuff works best if it is heated up till it pours like water. Then rotate the door slowly until the inside of the entire door has been coated then drain out the excess. One caution if you ever have to do any welding on the door be prepared for the coating to catch fire, which means any welding should be done with the door removed from the truck. Cheers Phil
__________________
Phil Waterman `41 C60L Pattern 12 `42 C60S Radio Pattern 13 `45 HUP http://canadianmilitarypattern.com/ New e-mail Philip@canadianmilitarypattern.com
|
|
#16
17-02-09, 03:35
|
|||
|
|||
|
The door(s) I was working on were off a Cab 13, the outer shin was ripped around the hinges and needs other patching too. Oddly, it seems to have fatigued in the corners rather than seriously rusted. I was also curious to see how the door was built.
To open up the door I drilled out the spot rivets and bent back the flange around the door edges. I probably should have used heat along the fold line to soften things because the metal was cracking as I unfolded it. Not really surprising given the tight fold. One interesting thing, it seems they assembled the screws at the top of the door, then did a very few spot welds to hold the two faces of the door in place as they folded the flange over and then did the main series of spot welds around the perimeter. As with all CMP welding, the quality was "variable". The initial locating welds were missed as I started the door disassembly. Bob's doors were off cabs 11 and 12. Interesting to note how many more parts were used to make the earlier doors. But each part cound be made using much simpler equipment.
|
|
#17
18-02-09, 01:15
|
||||
|
||||
|
I am now the legally registered owner of my (unfit) HUP. It took no less than three visits to the license office, hours on the phone to Manitoba for a lien and registration search (at a cost), a game of fax tag between myself, Manitoba Vehicle Registry and the Ontario License Office, a sworn affidavit (at city hall at a horrendous expense), a copy of the bill of sale and a appraisal, but it is done!
Another small step towards a spring roll out…Many thanks to Gunner and to David at the Kemptville License Office. I think the next HUP should be easier to register...or maybe not.
__________________
RHC Why is it that when you have the $$, you don't have the time, and when you have the time you don't have the $$?
|
|
#18
18-02-09, 01:19
|
||||
|
||||
|
Quote:
Clive, How long have you been having these hot flashes? Do you feel the need to buy a convertible? Or perhaps go on an adventure somewhere? Hopefully, you will get a chance to come back to Ottawa on leave to (ahem) chill out...
__________________
RHC Why is it that when you have the $$, you don't have the time, and when you have the time you don't have the $$?
|
|
#19
20-02-09, 00:03
|
|||
|
|||
|
Rob:
Congratulations! After throwing a lot of money at the provincial government you now have proof that you own something thats been yours for years!! Staggering!  Mike Mike 
__________________
Mike Calnan Ubique! ("Everywhere", the sole Battle Honour of the Royal Regiment of Canadian Artillery) www.calnan.com/swords
|
|
#20
21-02-09, 17:25
|
||||
|
||||
|
Quote:
Back to the main topic - It helped going to a rural office as the offices close to home seem to be run by male-hating, weightwatcher wannabes, who see us as "inconveniences". I was more than a little annoyed by the constant questioning of my motives (“Why would you want to register that?”) and their slavery to procedures (“Why doesn’t the VIN have 17 digits?”). The less than helpful manner in which I was treated in Ottawa contrasts with the excellent advice and assistance given by David and his team in Kemptville. Bottom line is that the HUP is legally registered in my name and registration is one more step toward the Spring 09 roll out. Seven years...King Solomon would not be impressed!
__________________
RHC Why is it that when you have the $$, you don't have the time, and when you have the time you don't have the $$?
|
|
#21
21-02-09, 21:18
|
||||
|
||||
|
Quote:

__________________
Those who live by the sword will be shot by those of us who have progressed. - M38A1, 67-07800, ex LETE
|
|
#22
23-02-09, 03:38
|
||||
|
||||
|
Bob queried my posting of photos on this thread. He had a question from a fellow CMPer from afar about the types of photos being posted on threads. Since the Posting Photos thread is locked, I'll respond here with my two cents worth.
We have two options as far as I know: Attaching thumbnails; or Attaching a photo via URL. Both have advantages and disadvantages. The Thumbnail is easy to effect - just follow the directions under "Manage Attachments". Once posted it requires that extra step (clicking) to expand it but it usually only gets a little larger. No problem. You can save the photo by right clicking and selecting the save options. You can then open the photo in a photo manipulation program and have your way with it. My preferred option is to post a URL to a photo by copying it and pasting it into the text field of a reply. There are disadvantages - first, you need to join an online photo archiving website (I use Photobucket), set up an account and upload the photos to the website. You must also allow public viewing, so save the "candid snaps" for your private viewing... Once uploaded, you superimpose the cursor over the photo and all sorts of detail pops up. Select the URL, copy and paste it as mentioned. Here's the rub - if the website closes up shop or changes some of its "character", your link may/will be lost. I am not sure how much bandwidth URLs take up, but the larger photos sure look nice... We will see if Bob goes the thumbnail or URL route when he posts photos of today's barn antics...
__________________
RHC Why is it that when you have the $$, you don't have the time, and when you have the time you don't have the $$?
|
|
#23
25-02-09, 03:01
|
||||
|
||||
|
Guy Vapeur of the Hammond Quartet spent the night imitating Betsy Ross (do a Goggle search if you don't recognize this American icon). Now all Bob needs to do is construct a flag pole to mount on the barn!
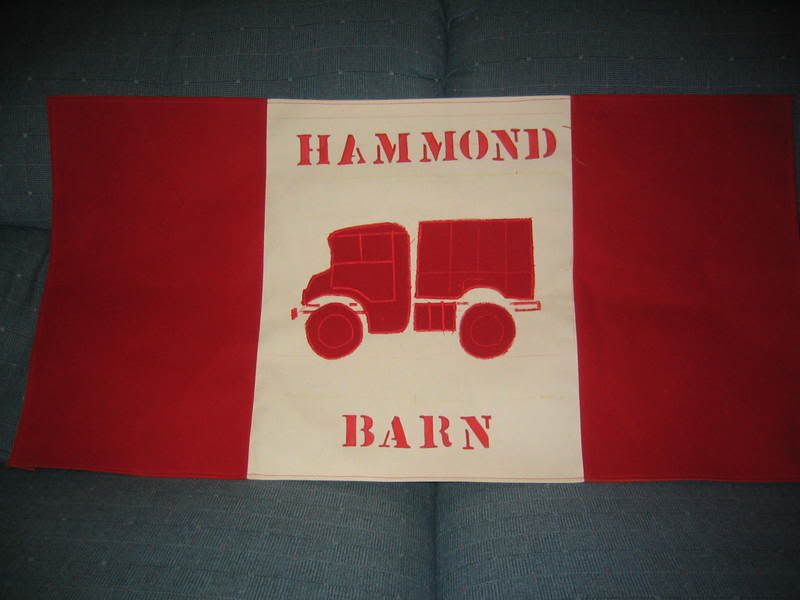 Well done, Guy.
__________________
RHC Why is it that when you have the $$, you don't have the time, and when you have the time you don't have the $$?
|
|
#24
27-02-09, 03:39
|
||||
|
||||
|
The spare tire mounting hardware was the focus of my efforts last weekend at the barn. Bob and Grant were of great assistance by providing advice, welding and some heavy lifting.
We used the old "trial and error" method of construction and fitting with more emphasis on the error part of the equation. The tire hold down bar was an easy build. I decided to go with a "T" bar configuration instead of just a wheel nut as in the original configuration. I don't expect that there will be too many folks tinkering with the hardware, but to make sure they don't end up wearing a very heavy wheel, a lock will be fitted in the future. Hold Down Bar post welding:  Central Shaft mounted - the outside nut was removed to allow play:  Two man lift - those old wheels are HEAVY!  Almost finished product - the shaft was subsequently shortened: 
__________________
RHC Why is it that when you have the $$, you don't have the time, and when you have the time you don't have the $$? Last edited by RHClarke; 27-02-09 at 03:45.
|
|
#25
27-02-09, 06:44
|
|||
|
|||
|
Rob,
I noticed the flotsam 'n jetsom in the HUP.....U livin in it? cheers Mike
|
|
#26
27-02-09, 12:14
|
||||
|
||||
|
Hi,
i want to say i am proud of you you don't make hold bob lift that heavy tire because as he age you have to be careful
__________________
Eric Thibodeau 1942 willys Jeep
|
|
#27
27-02-09, 19:05
|
||||
|
||||
|
Quote:
The "crap" in the back consists of HUP parts, rags, tools, nuts and bolts and "essence of cat". We at the barn employ "natural" security to repel interlopers. In the hot season, our trusty nests of hornets keep thieves at bay. In winter, we employ biological agents to repel folks (it all comes free as part of the deal we struck with Bob). I will of course have the back cleaned out for the Spring Roll Out. I'll give you the royal tour on your next visit.
__________________
RHC Why is it that when you have the $$, you don't have the time, and when you have the time you don't have the $$?
|
|
#28
27-02-09, 19:32
|
||||
|
||||
|
Quote:
We try to keep Bob out of the way of heavy objects, but he still holds his own when it comes to the heavy lifting around the barn. In this instance, he was the photographer - not on par with the excellent award-winning abilities of Joyce, his spouse, but he is getting there. Joyce prefers to photograph birds of prey, while Bob likes to record the life cycle of iron oxide... Every once in a while we have to use brute strength to lift objects - particularly when the tractor isn't available. In essence, we at the Hammond Barn are efficiency experts (yep, I mean lazy).
__________________
RHC Why is it that when you have the $$, you don't have the time, and when you have the time you don't have the $$?
|
|
#29
02-03-09, 23:53
|
|||
|
|||
|
But I am very fortunate to have Rob and Grant to help out with the heavy handling....... I know my limitations....
.......they refer to the back breaking activities as "paying the rent"..... ..... they are overpaid by now!!!!! BooB
__________________
Bob Carriere....B.T.B C15a Cab 11 Hammond, Ontario Canada
|
|
#30
12-03-09, 01:09
|
||||
|
||||
|
The Hammond Quartet has been busy, but you would never know it by the lack of postings to this thread...Bob spent last weekend working on his "practice" door. Grant lent assistance when and where necessary - I'm not sure what he is up to barn wise, but I hear he is being kept busy with another project, which I hope he will be able to report on. Guy delivered the "colours" to the barn and they now adorn a place of honour in the back of the barn.
My time last Sunday was spent on small tasks including test fitting the rear fender and the installation of the "opera" window on the driver side of the HUP. I still have the original "Armorlite" opera window and the original sliders for the side, rear and front doors. They are a little scratched up and not as clear as they were all those years ago, but they add "character" to the HUP.  In the meanwhile, I got our local welding shop (Wright's Welding in North Gower, Ontario) to make up a few POW can holders for the back of my HUPs. I had them made with larger lips in case I decide to line the back and front edges with rubber to prevent vibration and wear on the cans. I have a few spares and will price them out sometime in the future - unless someone has something "trade-worthy". Here are some shots of the component pieces and a comparison shot of the old POW can holder with the new holder.   Hopefully, we will be reporting on upcoming road trips and other adventures...
__________________
RHC Why is it that when you have the $$, you don't have the time, and when you have the time you don't have the $$?
|
 |
| Thread Tools | |
| Display Modes | |
|
|


 Linear Mode

