The axle is now disassembled.

All applicable parts (most of em!) can now go off for blasting.
I won't do that until Wednesday next week.
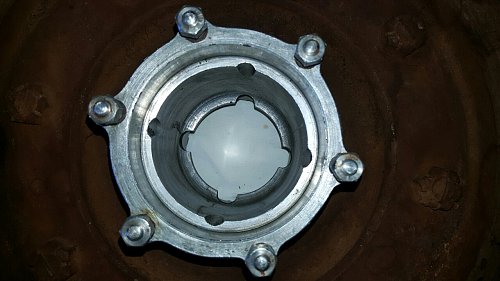

It was a great surprise to see virtually every internal part is in fantastic condition. Didn't snap one stud, or ruin thread or nuts. Some nuts came away with one tap of the hammer on end of the spanner. Some were a little more determined, but came away none the less. The brake shoes and mechanisms are in very good shape. I won't be messing with them, but will tape them and the axle shafts off, so no blasting grit gets in there. Besides, the brake shoe linings would be asbestos material. I'll give the brakes and inner backing plates a good wash down with petrol before the blaster gets hold of them. One hub was very simple to remove, while the other took a bit more work. That one was welded to the brake shoe linings and some force was needed to seperate the two parts. With the hub finally off, I could see some light corrosion was the culprit. That was compounded by the thickness of the linings themselves. They looked almost new, and were thicker that the ones on the other side.
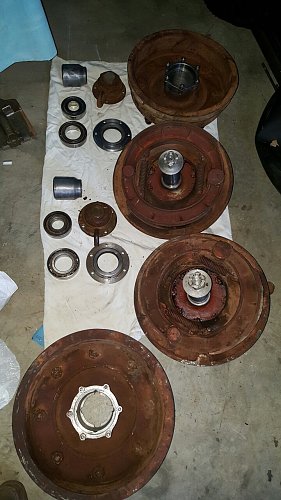
I am tempted to break my own golden rule and reuse all four bearings. They are completely undamaged or worn. I had to strip out all the old grease. It had turned to consistency of Vegemite. In fact, it was the same color too. Once all that goop was removed, the bearings were examined closely, without any corrosion or wear discovered. Each one has a cage made from what looks like bronze or brass. If I can refill them with fresh grease, I'll save them all. Grease seals, on the other hand, are both for the bin. One is borderline servicable, but will get chucked along with the other, more cheesy consistency one.

Phillip, I'm very glad you wrote about using a jigsaw to cut the remaining tyre apart. I really didn't consider the blade would stand up to the job, so overlooked that entirely! I was wrong. I did break one blade, but it was a situational thing that happens when it's so dark you can't see what you are doing. I had REALLY wanted to try cutting the tyre from the wheel, so a little thing like lack of sight wasn't going to stop me. I then went on to release one of the beads from the wheel, using a cold chisel. It took about 15min, and I was virtually 'using the force' by that time. Quite surprised I didn't mash a finger actually.
I found some parts which date manufacture to 1941, according to stamps on various locations.
This axle was a great purchase. The lack of nasty surprises is a refreshing change from my usual modus operandi, trust me!
It appears that hubs and stub axle plates were fully painted before being assembled in the factory. There was/is green paint in places that could NEVER be reached once final assembly had been done. Pity to cover it up, really. If my paintjob lasts as long as this paint has endured, I will be very happy............and dead by about 40 years too, I figure!